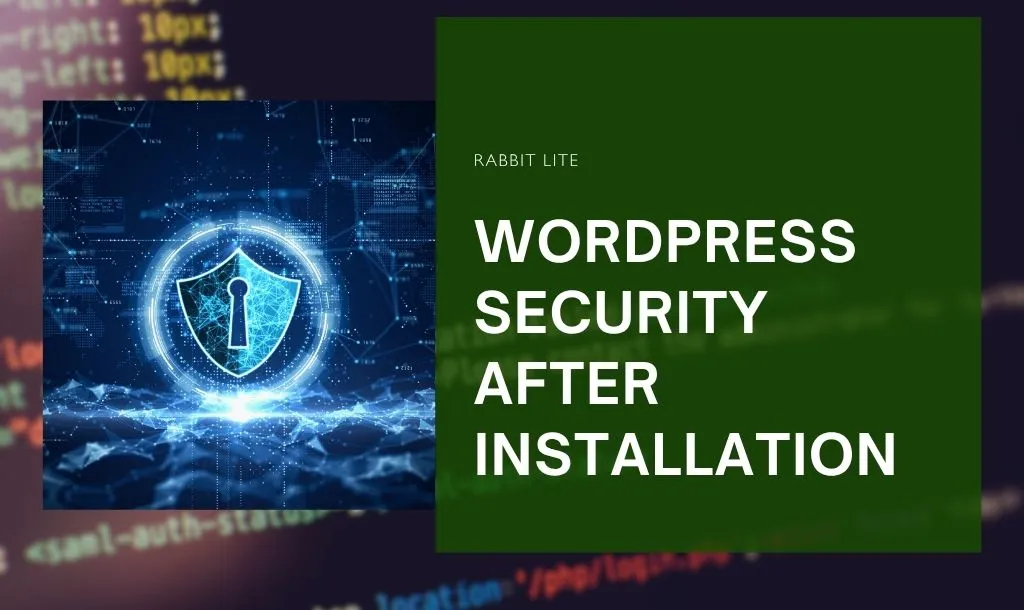
- 1. Why You Must Secure WordPress Immediately After Installation
- 1.1. The “Zero Window” of Vulnerability
- 1.2. How Bots and Scanners Target Default WordPress Sites
- 1.3. The Benefits of Early Hardening
- 2. WordPress Security After Installation — Step-by-Step Guide
- 2.1. Update Core, Plugins, Themes Immediately
- 2.2. Secure Admin Account and Logins
- 2.3. File & Server Hardening (Permissions and Configs)
- 2.3.1. Set Correct Permissions:
- 2.3.2. Protect Sensitive Files:
- 2.3.3. Disable Directory Listing:
- 2.3.4. Turn Off PHP Error Display in Production:
- 2.3.5. Protect the Uploads Folder from PHP Execution
- 2.4. SSL, HTTPS, and Network Protection
- 2.4.1. Install SSL Certificate
- 2.4.2. Force HTTPS
- 2.4.3. Fix Mixed Content Issues:
- 2.4.4. Add a Web Application Firewall (WAF)
- 2.4.5. Use SFTP or SSH
- 2.5. Backup, Monitoring, and Logging
- 2.5.1. Set Up Automated Backups
- 2.5.2. Enable Activity Logging
- 2.5.3. Use Malware Scanning
- 3. WordPress Security Audit Checklist — Verify Your Setup
- 3.1. Core & Plugin Audit
- 3.1.1. Verify Updates
- 3.1.2. Run Vulnerability Scanners
- 3.1.3. Remove or Replace Unmaintained Plugins
- 3.2. User & Role Review
- 3.2.1. Check User Accounts
- 3.2.2. Minimize Privileges
- 3.2.3. Audit Passwords and MFA
- 3.3. Security Headers & Hardening Settings
- 3.3.1. Set Security Headers:
- 3.3.2. Disable XML-RPC
- 3.3.3. Hide WordPress Version and Disable File Editing
- 3.4. Penetration / Vulnerability Testing
- 3.4.1. Run Automated Scans
- 3.4.2. Manual Testing
- 3.4.3. Analyze Logs
- 3.5. Performance & Load Considerations
- 3.5.1. Use Lightweight Themes
- 3.5.2. Implement Caching and CDN
- 3.5.3. Avoid Plugin Overload
- 4. FAQ — Common Questions About WordPress Security
- 4.1. How often should I perform WordPress security audits?
- 4.2. Can a lightweight theme like Rabbit Lite reduce security risks?
- 4.3. Which security plugins or tools are essential for audit and protection?
- 4.4. What if an audit finds a serious vulnerability?
- 5. Conclusion
WordPress Security After Installation is one of the most critical steps every site owner must take. When you’ve just finished installing WordPress, your excitement is high — but so is your risk. That fresh installation, still running with default settings, is one of the most vulnerable stages your website will ever face.
Many beginners skip these essential security steps, assuming they can “do it later.” Unfortunately, that “later” often comes after a hack, malware infection, or even total data loss.
This guide will walk you through exactly how to secure WordPress right after installation, step-by-step. By the end, you’ll have a complete WordPress Security Audit Checklist to harden your site, protect your data, and rest easy knowing your website is safe from day one.
Why You Must Secure WordPress Immediately After Installation
WordPress Security After Installation is not optional — it’s essential. The moment your site goes live, it becomes a target. Securing it immediately prevents attacks before they even begin.
The “Zero Window” of Vulnerability
From the moment WordPress is installed, attackers can detect your site.
Bots continuously scan the internet for fresh WordPress installations using default credentials, known file paths, and version data.
Leaving your site unprotected even for a day can lead to an automated attack — no human hacker required.
How Bots and Scanners Target Default WordPress Sites
Attack bots often:
- Try default “admin” usernames with common passwords.
- Exploit outdated plugins or themes from your host’s auto-installer.
- Collect your WordPress version number to search for known exploits.
They don’t care how small your website is. Every hacked site becomes a tool for spamming, redirecting, or mining crypto — all at your expense.
The Benefits of Early Hardening
Securing WordPress immediately after installation is like locking the doors before moving into a new house. Those first few hours are when your site is most exposed — bots and scanners constantly look for new, unprotected WordPress installs to attack.
By securing your site right away, you:
- Prevent brute-force and credential attacks: Hackers often target default usernames like admin or weak passwords. Taking action early — by changing credentials and enabling 2FA — blocks these automated attempts before they start.
- Stop automatic exploit bots: Within minutes of going online, your site can be probed by bots searching for known plugin or theme vulnerabilities. Hardening security at this stage ensures these bots find nothing to exploit.
- Build a strong, clean foundation before going live: A secure setup means fewer issues later. By tightening permissions, installing SSL, and configuring firewalls now, you create a reliable base that supports performance, SEO, and user trust.
WordPress Security After Installation — Step-by-Step Guide
Below are practical actions you should perform immediately after installation. Follow them in order to secure your WordPress foundation before adding content or customizations.
Update Core, Plugins, Themes Immediately
WordPress frequently releases security patches to fix vulnerabilities. The first thing to do after installation is to update everything.
- Update WordPress Core: Go to Dashboard → Updates and click Update Now. Running the latest version ensures you’re protected against known security flaws.
- Update or Remove Plugins and Themes: Default installations often include unnecessary themes or plugins. Delete any you’re not using — every inactive plugin is potential risk.
If you’re using Rabbit Lite, keep it updated and avoid unverified child themes. Use only plugins from trusted developers with regular updates.
Secure Admin Account and Logins
Your login page is the main gateway for attackers. Securing it should be top priority.
- Change Default “Admin” Username: If your username is still “admin,” change it immediately.
You can do this by creating a new user with Administrator role, logging in as that user, and deleting the old “admin” account. - Use Strong Passwords: A secure password is at least 12 characters, mixing upper/lowercase, numbers, and symbols.
Use password managers like Bitwarden or 1Password for convenience. - Enable Two-Factor Authentication (2FA): 2FA adds a second verification layer. Plugins like Jetpack Security, Wordfence Login Security, or WP 2FA make it simple to set up.
- Limit Login Attempts: Use built-in protection if your theme supports it — for example, Rabbit Lite Theme already includes a login attempt limiter to block repeated failed logins automatically. If your theme doesn’t offer this, you can install plugins like Limit Login Attempts Reloaded or NitroPack Security Add-on for similar protection.
File & Server Hardening (Permissions and Configs)
File permissions determine who can read, write, or execute files on your server. Misconfigured permissions are a common cause of hacked sites.
Set Correct Permissions:
- Folders →
755 - Files →
644 wp-config.php→600
You can set these using your FTP client or hosting control panel.
Protect Sensitive Files:
Add these lines to your .htaccess file to block unauthorized access:
<files wp-config.php>
	order allow,deny
	deny from all
</files>
However, it’s also important to protect other sensitive files such as .htaccess and error_log.
Therefore, you should update the above code to:
<FilesMatch "^(wp-config\.php|\.htaccess|error_log|readme\.html|license\.txt)$">
    Order allow,deny
    Deny from all
</FilesMatch>
Disable Directory Listing:
In your .htaccess file, add the following line:
Options -IndexesThis simple directive disables directory listing on your server. When directory listing is enabled, anyone can open a URL like: https://yourwebsite.com/wp-content/uploads/ and see all the files inside that folder — including images, backups, or configuration files.
By adding Options -Indexes, the web server will return a “403 Forbidden” error instead of displaying the file list.
This helps prevent hackers or bots from exploring your site’s folder structure and identifying potential vulnerabilities.
It’s a quick, lightweight security enhancement that every WordPress site should have.
Turn Off PHP Error Display in Production:
It’s important to keep error logging enabled so you can identify issues that occur on your website — but you should never display those errors publicly.
Publicly visible PHP errors can expose sensitive information such as:
- File system paths (which help attackers locate important files)
- Database details or variable names
- Plugin or theme vulnerabilities
Instead, configure WordPress and PHP to log errors privately. This way, developers can review the logs securely without exposing details to visitors.
In your wp-config.php, use this setup:
define('WP_DEBUG', true);
define('WP_DEBUG_LOG', true);
define('WP_DEBUG_DISPLAY', false);
@ini_set('display_errors', 0);
@ini_set('display_startup_errors', 0);
This configuration will store error details inside /wp-content/debug.log, which you can review through FTP or your hosting file manager.
Protect the Uploads Folder from PHP Execution
The wp-content/uploads directory stores all user-uploaded files, such as images, documents, and media.
However, because this folder is publicly accessible, it can become a serious security risk if a malicious PHP file is ever uploaded.
To protect your website, you should disable PHP execution inside the uploads directory.
This ensures that even if a hacker manages to upload a .php file, it cannot be executed on your server.
Add the following rule to a new .htaccess file inside the /wp-content/uploads/ folder:
<FilesMatch "\.php$">
    Order allow,deny
    Deny from all
</FilesMatch>
This directive blocks all .php files from running in that directory.
Result: Even if someone uploads a PHP shell or script into the uploads folder, it will not be executed — the server will return a “403 Forbidden” error instead.
/wp-content/cache/ or /wp-content/temp/, to add an extra layer of protection.SSL, HTTPS, and Network Protection
An SSL certificate encrypts data between your website and users, preventing credential theft.
Install SSL Certificate
Most hosting providers offer free SSL certificates through Let’s Encrypt, which can be activated in just a few clicks.
If your host doesn’t install it automatically, you can manually enable SSL via cPanel or Cloudflare’s free SSL service.
Using HTTPS ensures that all data between your visitors and server is encrypted and secure, protecting login credentials and sensitive information from potential attacks.
Once SSL is installed, make sure to:
- Update your WordPress and Site URLs to use
https:// - Redirect all HTTP traffic to HTTPS via
.htaccess - Fix any mixed-content issues (insecure images, scripts, or stylesheets)
For detailed steps, check out our guide on Rabbit Lite — see the article titled “Install SSL WordPress” for a complete walkthrough of automatic and manual SSL setup methods.
Force HTTPS
Use a plugin like Really Simple SSL or edit .htaccess:
RewriteEngine On
RewriteCond %{HTTPS} off
RewriteRule ^(.*)$ https://%{HTTP_HOST}%{REQUEST_URI} [L,R=301]
If you are using the Rabbit Lite Theme, you can simply enable the Using SSL option in the theme settings, then go to Rabbit Lite > Utilities > Apply Canonical to automatically enforce HTTPS across your entire site without manually editing the .htaccess file. This approach helps prevent duplicate URL versions and ensures that search engines index only the secure version of your pages.
Fix Mixed Content Issues:
After enforcing HTTPS, check for insecure image or script URLs. Use browser console (Ctrl+Shift+I → Console tab) to identify issues.
Add a Web Application Firewall (WAF)
WAFs such as Cloudflare, Sucuri, or Wordfence filter malicious traffic before it reaches your site.
Use SFTP or SSH
Never use plain FTP — credentials can be intercepted. Use SFTP or SSH for file transfers instead.
Backup, Monitoring, and Logging
Backups are your safety net. Without them, even a small attack can cause permanent damage.
Set Up Automated Backups
Regular backups are the foundation of any secure WordPress website. Use trusted plugins such as UpdraftPlus, Jetpack VaultPress, or BlogVault to schedule automated backups on a daily or weekly basis, depending on how often you update your content. Always store your backup files offsite — for example, on Google Drive, Dropbox, or Amazon S3 — instead of keeping them on your hosting server.
This prevents data loss in case your hosting environment becomes compromised or corrupted. It’s also a good practice to periodically test your backups to ensure they can be restored successfully when needed.
Enable Activity Logging
Keeping track of user and system activities is essential for detecting suspicious behavior early. Enable detailed activity logging to record who logs in, edits posts, changes files, or installs plugins. Plugins such as WP Activity Log or Sucuri Security offer comprehensive dashboards that let you review these logs and receive alerts about unauthorized actions. Activity logs also help in troubleshooting issues and maintaining accountability, especially for multi-author or team-managed websites.
Use Malware Scanning
Malware Scanning and Snapshots — Malware scanning acts as an early warning system for your site’s security. Install a reputable scanner that automatically checks your WordPress files, themes, and plugins for signs of infection or unauthorized modifications.
Tools like Wordfence, WPScan, or MalCare continuously monitor your site and notify you immediately if malicious code is detected. Some scanners even allow automatic cleanup or quarantining of infected files, helping prevent further damage and minimizing downtime.
WordPress Security Audit Checklist — Verify Your Setup
Now that your site is hardened, it’s time to verify your setup. A regular audit ensures your security doesn’t degrade over time.
Core & Plugin Audit
Regularly review your WordPress core, themes, and plugins to ensure everything is up to date and from trusted sources. Remove unused or abandoned plugins to minimize security risks, and verify that all active components are compatible with the latest WordPress version. This helps maintain site stability, performance, and protection against known vulnerabilities.
Verify Updates
Keeping your WordPress installation fully updated is one of the most effective ways to protect your website. Always make sure that the WordPress core, plugins, and themes are running the latest versions released by their developers. These updates often include important security patches, bug fixes, and performance improvements. You can enable automatic updates directly from your Dashboard under Dashboard → Updates → Enable auto-updates, or manage them selectively for specific plugins and themes. Regular updates reduce exposure to known exploits and keep your site stable and secure.
Run Vulnerability Scanners
Even with updates, vulnerabilities can sometimes go unnoticed. To detect potential threats early, use reputable security scanners such as WPScan, Astra Security, or Sucuri SiteCheck. These tools scan your WordPress installation against known vulnerability databases and alert you if any outdated components or unsafe configurations are found. Running regular scans helps you take proactive action before attackers can exploit weaknesses in your site’s setup.
Remove or Replace Unmaintained Plugins
Outdated or abandoned plugins are one of the biggest sources of WordPress security issues. If a plugin has not been updated for a long time or is no longer supported by its developer, it may contain unpatched vulnerabilities that attackers can exploit. Regularly audit your installed plugins and remove any that are no longer maintained. When possible, replace them with modern, well-supported alternatives from reputable developers. This simple step greatly reduces your attack surface and helps maintain long-term site stability.
User & Role Review
Regularly review user accounts and their assigned roles to ensure each person has only the permissions they need. Limiting access reduces risks from accidental changes or unauthorized activities.
Check User Accounts
Regularly audit all user accounts to ensure only active and trusted individuals have access to your WordPress dashboard. Remove outdated contributors, former employees, or temporary accounts that are no longer needed. Unused accounts can become easy targets for attackers, especially if their passwords are weak or compromised in other breaches.
Keeping your user list clean helps maintain tighter control over site access and reduces potential security exposure. Assign roles only to people currently managing content or performing administrative duties. This simple housekeeping step strengthens your overall security posture and keeps unauthorized users from slipping through unnoticed.
Minimize Privileges
Apply the principle of least privilege when assigning roles to users. Only grant administrative rights to those who truly need them for essential site management tasks. Most users can operate effectively with the Editor, Author, or Contributor roles without requiring full admin access.
Limiting privileges reduces the risk of accidental changes, data loss, or the misuse of sensitive settings. It also ensures that if a lower-level account is ever compromised, the potential damage to your site is minimized. A well-structured role system helps maintain both security and workflow efficiency.
Audit Passwords and MFA
Strong authentication practices are vital for keeping your WordPress site secure. Regularly review password policies and encourage users to create long, unique passwords that include a mix of letters, numbers, and symbols. Password managers can help maintain this standard across your team.
Additionally, verify that Multi-Factor Authentication (MFA) remains enabled for administrators and key contributors. MFA adds a critical second layer of protection, making it much harder for attackers to gain access even if a password is stolen. Consistent authentication audits ensure your access points stay secure over time.
Security Headers & Hardening Settings
Security headers help browsers block common attacks like clickjacking and XSS.
Set Security Headers:
Add the following headers in .htaccess or your server config:
Header set X-Frame-Options "SAMEORIGIN"
Header set X-Content-Type-Options "nosniff"
Header set Referrer-Policy "no-referrer-when-downgrade"
Header always set Content-Security-Policy "default-src 'self'"
Disable XML-RPC
If you’re not using remote posting or the Jetpack mobile app, disable it by adding this line in functions.php:
add_filter('xmlrpc_enabled', '__return_false');
Hide WordPress Version and Disable File Editing
You can hide the WordPress version information from your site’s source code by adding the following snippet to your functions.php file:
add_action('init', function() {
    remove_action('wp_head', 'wp_generator');
});
This removes the <meta name="generator" content="WordPress x.x.x" /> tag from the <head> section, preventing attackers from identifying your WordPress version and targeting related vulnerabilities. However, if you’re using the Rabbit Lite Theme, this feature is already enabled by default — the theme automatically hides the WordPress version for improved security without requiring any manual code changes.
Add to wp-config.php:
define('DISALLOW_FILE_EDIT', true);
Penetration / Vulnerability Testing
Testing simulates real-world attacks to evaluate your security.
Run Automated Scans
Set up automated vulnerability scans using tools like WPScan, Netsparker, or Burp Suite to quickly identify outdated plugins, weak configurations, and potential security flaws.
Schedule these scans regularly to detect new threats as your site evolves. Automated scanning provides a reliable first line of defense before issues can be exploited by attackers.
Manual Testing
Perform periodic manual security tests to identify vulnerabilities that automated scanners might miss. Focus on checking input fields, forms, and plugin settings for potential injection points.
Look for issues like SQL injection, cross-site scripting (XSS), or cross-site request forgery (CSRF). Manual verification ensures that real-world attack scenarios are thoroughly evaluated.
Analyze Logs
Review your access and error logs frequently to identify unusual behavior. Repeated failed login attempts, unfamiliar IP addresses, or strange user-agent strings can indicate hacking attempts.
Use log analysis tools or security plugins to track these patterns efficiently. Continuous monitoring helps you react quickly and strengthen defenses before damage occurs.
Performance & Load Considerations
Security means nothing if your site becomes too slow to use.
Balancing safety with performance is key.
Use Lightweight Themes
Choose a lightweight, well-coded theme such as Rabbit Lite to minimize unnecessary scripts and improve overall load time without compromising design or functionality.
A faster website is not only better for user experience and SEO but also more resilient against brute-force or DDoS attacks that rely on overwhelming slow servers.
Implement Caching and CDN
Use caching plugins like LiteSpeed Cache or WP Rocket to reduce server load by serving static versions of your pages to visitors.
Combine caching with a Content Delivery Network (CDN) such as Cloudflare to distribute traffic globally, ensuring faster access and reducing the impact of traffic spikes or targeted attacks.
Avoid Plugin Overload
Each additional plugin introduces new code and potential vulnerabilities, which can slow your site and increase the risk of conflicts or exploits.
Deactivate or permanently remove plugins you no longer use. Keeping your setup lean ensures better performance, fewer compatibility issues, and a smaller attack surface.
FAQ — Common Questions About WordPress Security
This section answers the most common questions about WordPress Security After Installation — from how often to run audits to which tools and practices keep your site safe long-term.
How often should I perform WordPress security audits?
A quarterly audit is the minimum.
For eCommerce or membership sites, monthly audits are ideal.
Security changes constantly — outdated software or expired certificates can open new vulnerabilities overnight.
Can a lightweight theme like Rabbit Lite reduce security risks?
Yes. Rabbit Lite’s clean codebase minimizes risk from unnecessary scripts or outdated libraries.
However, no theme can protect your login, hosting, or plugins — you must follow all hardening steps to stay secure.
Which security plugins or tools are essential for audit and protection?
Essential tools include:
- Wordfence (firewall and malware scanner)
- WPScan (vulnerability database)
- Sucuri Security (file integrity & firewall)
- Jetpack Security (login protection & backup)
Avoid using multiple plugins that serve the same function, as they can conflict and cause false positives.
What if an audit finds a serious vulnerability?
If a vulnerability is detected:
- Deactivate the affected plugin or theme.
- Restore your site from a clean backup.
- Update or patch immediately.
- If the problem persists, consult a professional or your host’s security team.
Never ignore alerts, even minor ones — small cracks can quickly become open doors.
Conclusion
Securing WordPress after installation isn’t just a good practice — it’s a necessity.
The combination of WordPress Security After Installation steps and a regular WordPress Security Audit Checklist forms the foundation of a safe, reliable website.
Even if you start with a fast theme like Rabbit Lite, remember: speed is nothing without security.
By following this guide step-by-step, you’ll not only harden your site but also gain confidence that every file, login, and setting is under control.